Activating Your License
A license key unlocks WooFraudGuard’s premium fraud rules, order-graph linking, and the Stripe/PayPal dispute webhooks. Without a key the plugin runs in Lite mode, which still provides the seven core rules — and risk explanations, which are never licence-gated.
Finding your license key
Your key is displayed in My account → Licenses immediately after purchase. It looks like CLM-XXXX-XXXX-XXXX-XXXX. Click the copy icon to copy it to your clipboard.
Entering the key in WordPress
- Go to WooFraudGuard → Settings.
- Click the License tab.
- Paste your key into the License Key field.
- Click Activate.
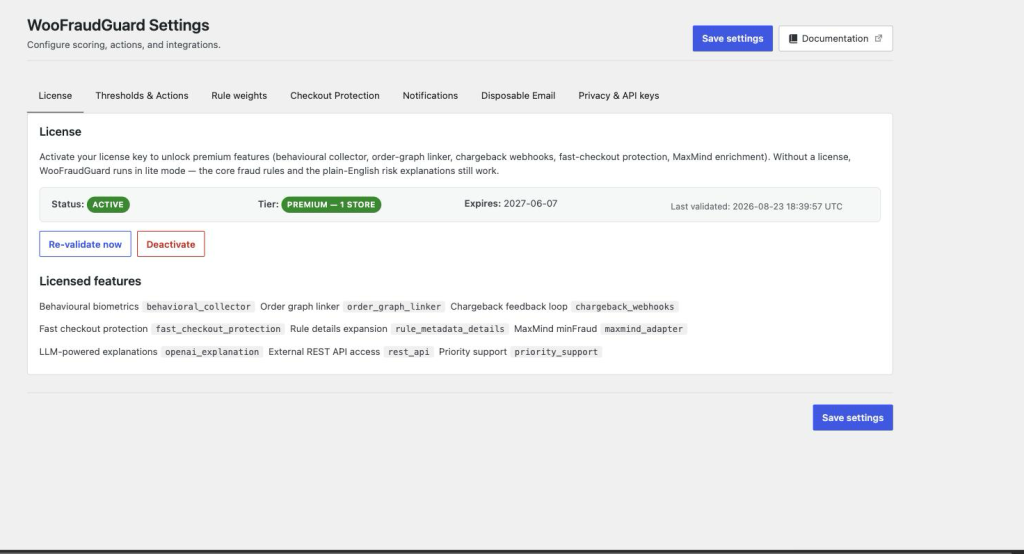
On success the status badge changes from Inactive to Active and the Licensed features section lists everything unlocked for your tier.
Keeping the key out of the database (advanced)
For extra security you can define the key in wp-config.php instead of storing it in the database:
define( 'WOOFRAUDGUARD_LICENSE_KEY', 'CLM-XXXX-XXXX-XXXX-XXXX' );When the constant is set the key field in Settings is read-only and the key is never written to the options table.
Using the same key on multiple sites
Each license allows a fixed number of simultaneous site activations depending on your tier. If you reach the limit, deactivate the key on a site you no longer use (Settings → License → Deactivate) before activating on a new one.
License auto-renewal
WooFraudGuard revalidates its license in the background every 24 hours. If revalidation fails (e.g., lapsed subscription) the plugin reverts to Lite mode. Plugin updates also stop until the license is renewed and reactivated.